In this article I will be discussing CI pipeline and what it is, then how in GitHub you can use it thru actions, then we will be taking a somewhat simple project from a previous course I have taken and implement and talk about how it works.
What is a CI pipeline?
CI or Continuous Integration used in software engineering as a practice. It is a way to say that you are constantly trying to integrate what you are working on. So if you are working on a project with a group of programmers, and you are working on the project in different branches, you are continuously merging and checking up on each other in order to merge the ideas/work together, compared to waiting until everyone is done with their versions then trying to merge those branches together.
Implementing a CI Pipeline in Github.
Still using the same example as above (a group of programmers working on a project together.) We can have now the project in GitHub; then go to the Actions Tab, and Add a new workflow and select which type you want to use. There are many different starter-types, or you can do a manual one and start from scratch.
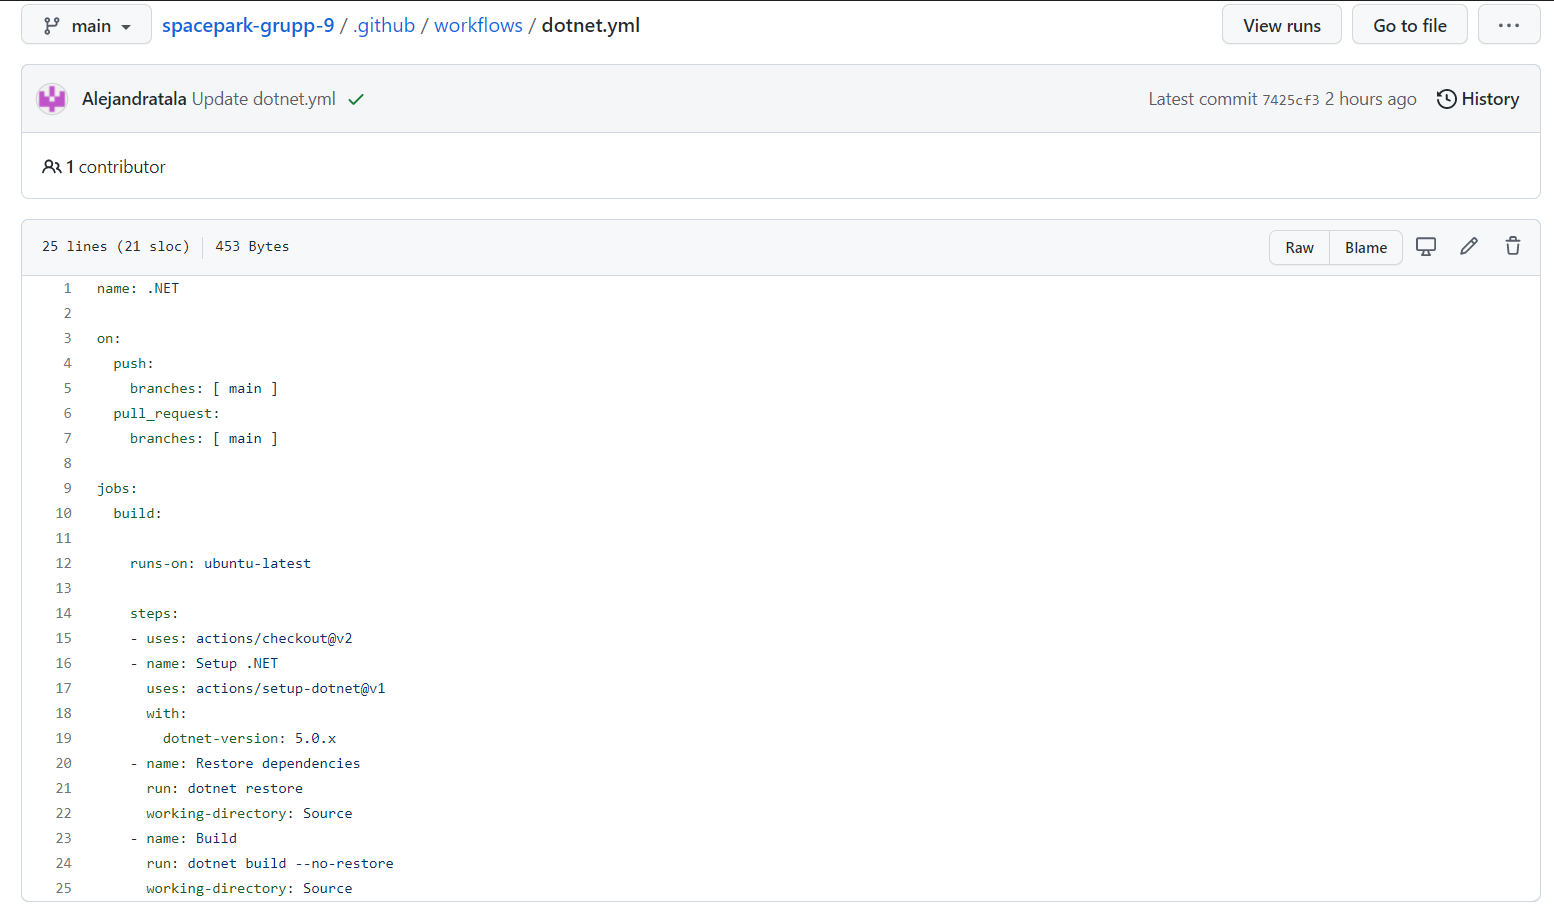
If you select one of the starter types, Like in my case I chose the .Net one, it will make you a folder inside the .github folder called workflows it will automatically name it dotnet.yml, and here it will auto generate some settings for the action, and with research you can set it up to check an action, for me that action was to:
-Check that every time someone tries to push to the main branch it will run all the code and check that everything is working properly/no code is broken.
dotnet.yml File

Line 1: here you put the name that you want, this will be displayed on the Actions.
Line 3-7: You are telling it what its going to be working on, in my case on push but only in the main branch, and also on pull requests for main branch.
Line 9-12: from here onwards you are telling it what the job is. In my case its building the project. And you telling it to use ubuntu.
Line 14-25: Here we give it the steps/actions that it will follow. I first got an error with the generic one that it gives you because you dont tell it where to work. I wanted it to work on the Source folder because that is where my solution is. So I added the working-directory: Source to tell it where to execute the run command.
References
An Introduction to Github Actions
GitHub .Net workflow template documentation